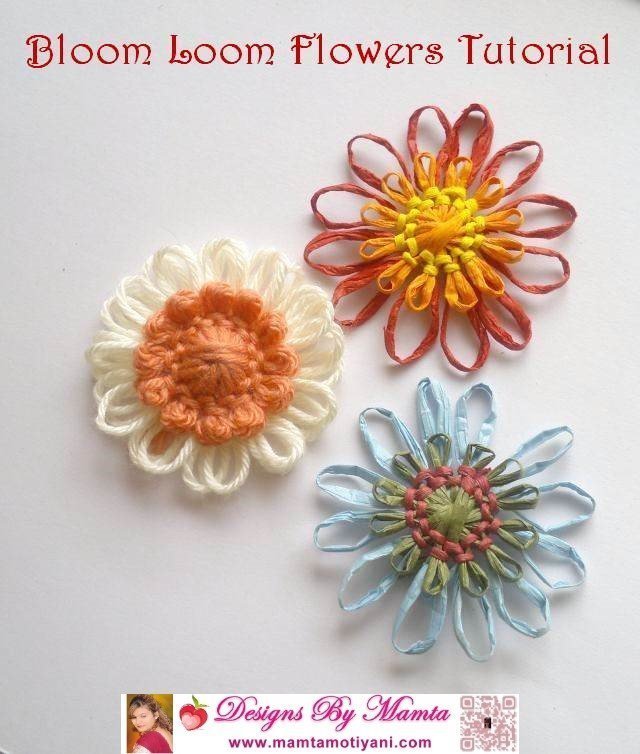
How To Make Bloom Loom Flowers
Bloom loom flowers using flowers looms are quick and easy to make. They make the perfect choice for summer crafts for kids. I will show you how I make bloom loom flowers using a vintage flower loom. It is a loom similar to Studio Twelve type of flower loom. However, you may use any bloom loom which can make flowers in 2 sizes.
You should be able to make 2 inches and 3 inches flower on this loom. It will be approximately 3.5 inches across to achieve this size of flowers.
I am going to use the layered wrap technique in a slightly different way. I will be using the back stitch center for the flowers. It is done in a little different manner as well.
Materials that I have used for this tutorial is for ease of understanding. But you may use any type of yarn. I used Caron Simply Soft to make flowers for my Loom Daisy Flower crochet applique pattern. In the crochet pattern, I made flowers with 3 layers for longer petals and 4 layers for shorter petals.
Bloom Loom Flowers Tutorial
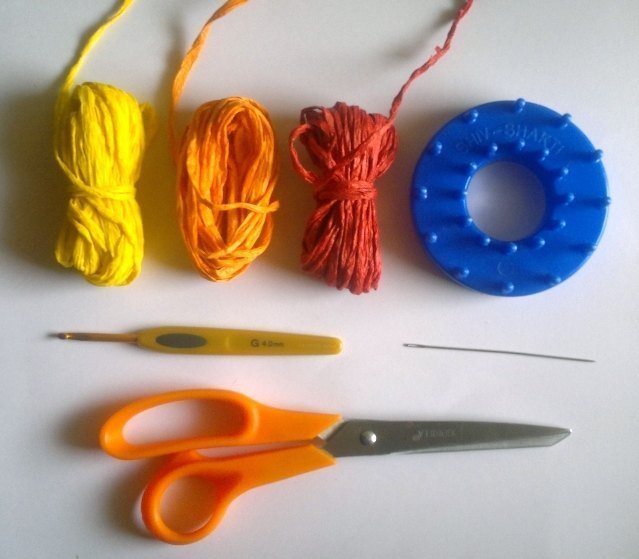
Supplies:
Paper Raffia in 3 colors: (You will need 1 yard of extra yarn for each increase in layer. This applies for both the longer and shorter petals.)
Red for Longer Petals: 1 to 1.5 yards
Orange for Shorter Petals: 1 to 1.5 yards
Yellow for back stitch center: 1 yard
Scissors
Darning Needle
4mm or slightly thicker/ thinner crochet hook
Flower Loom – It can be any one of these: Vintage Loom/ Bloom Loom/ Studio Twelve Bloom Loom
Glue
Instructions:
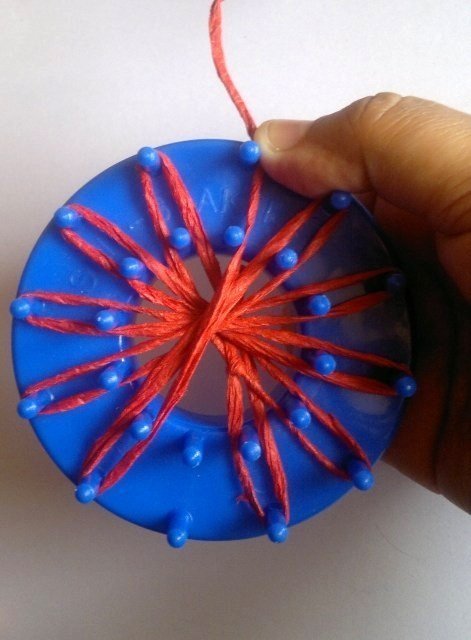
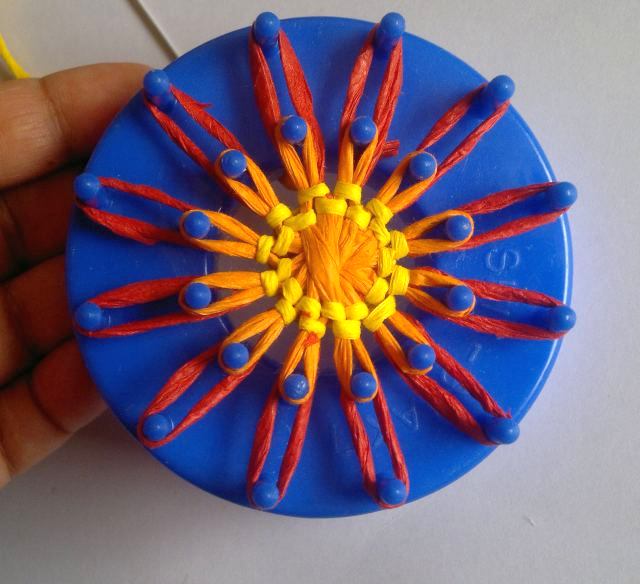
We will make a loom flower with red longer petals, orange shorter petals and embroidered back stitch with yellow yarn. I have used a single layer for this bloom loom flowers tutorial. For more layers, continue winding the yarn over the pegs spirally till you have the required number of layers on each peg.
I have added all the steps so even kids can use this tutorial. You may skip some repeat steps if you want to.
Step 1:
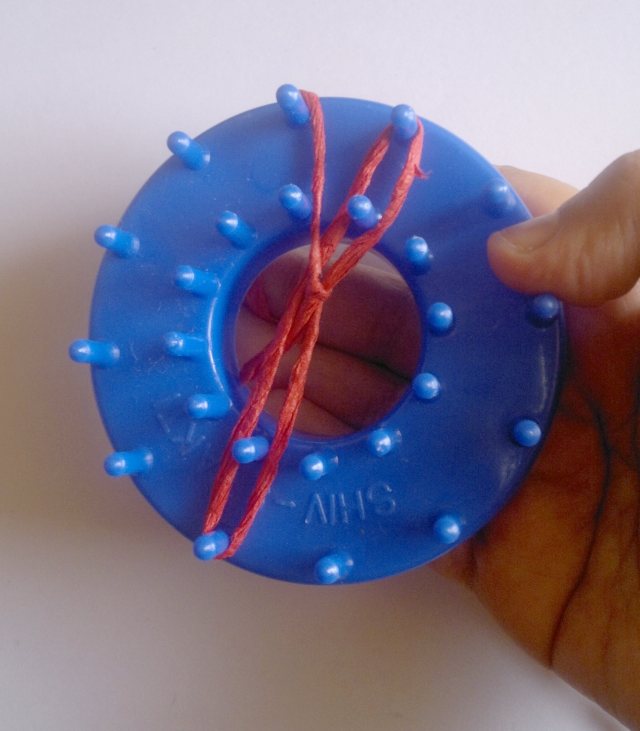
Join Red raffia yarn with a tight knot covering 4 pegs in the shape of figure 0.
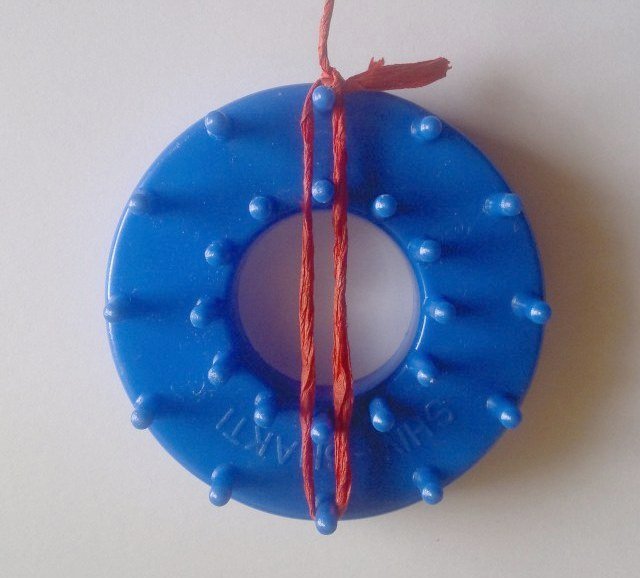
Step 2:
Move the knotted portion in the right center.
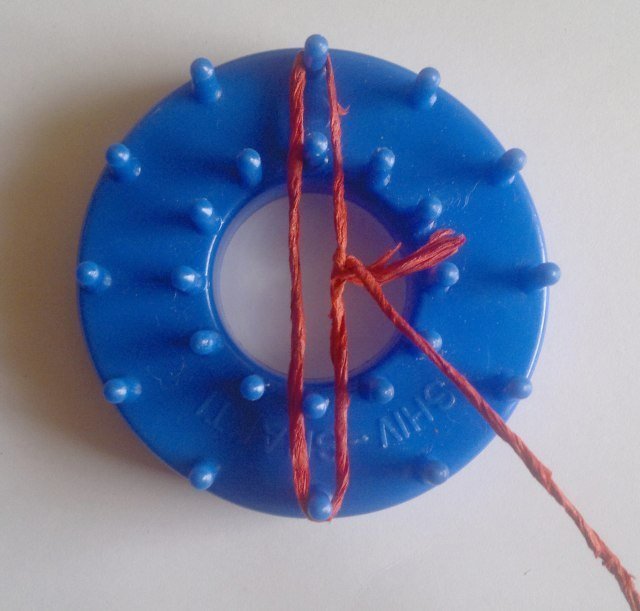
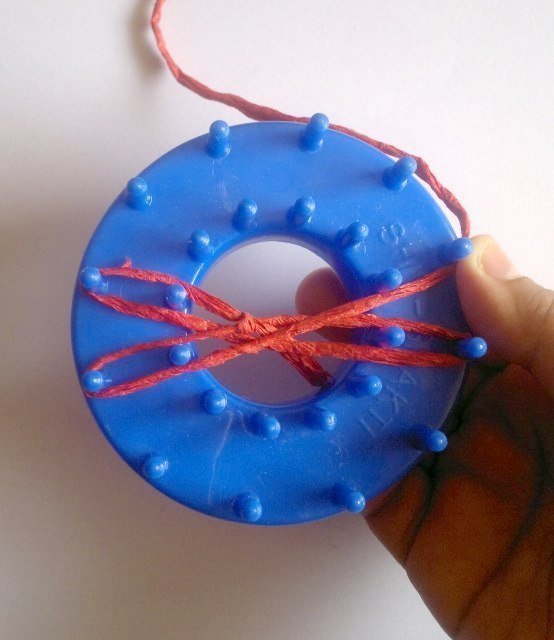
Step 3:
Move the loose end on the wrong side. Move the working yarn over the left peg.
Step 4:
Move the working yarn covering the other side of the peg. Then move it over the peg directly opposite to peg in Step 3.
Step 5:
Move the working yarn covering the other side of the peg. Then move it over the peg on opposite left to peg in Step 4.
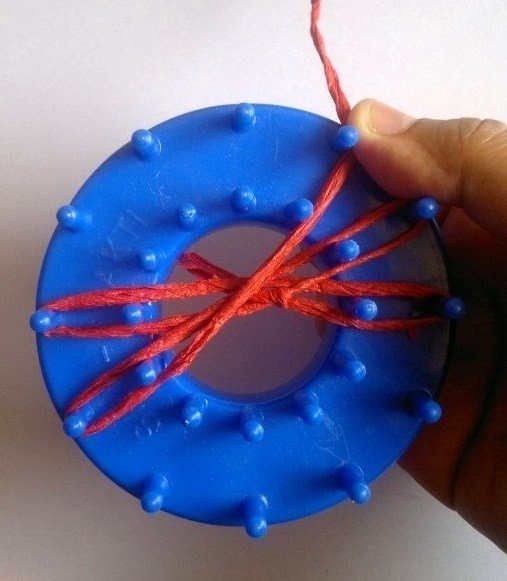
Step 6:
Move the working yarn covering the other side of the peg. Then move it over the peg directly opposite to peg in Step 5.
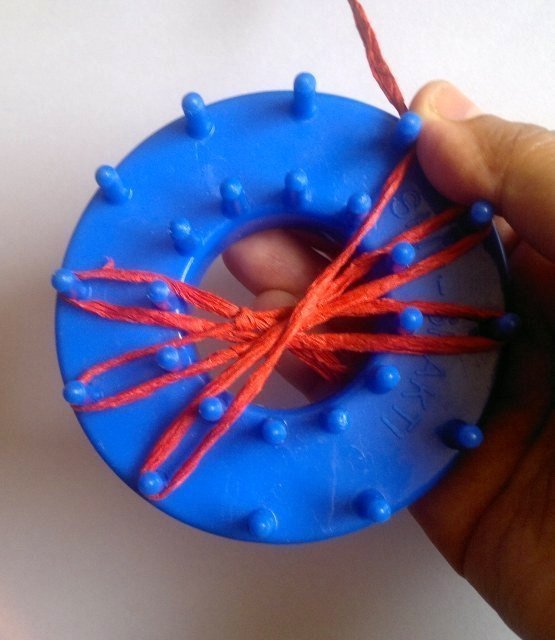
Step 7:
Move the working yarn covering the other side of the peg. Then move it over the peg on opposite left to peg in Step 6.
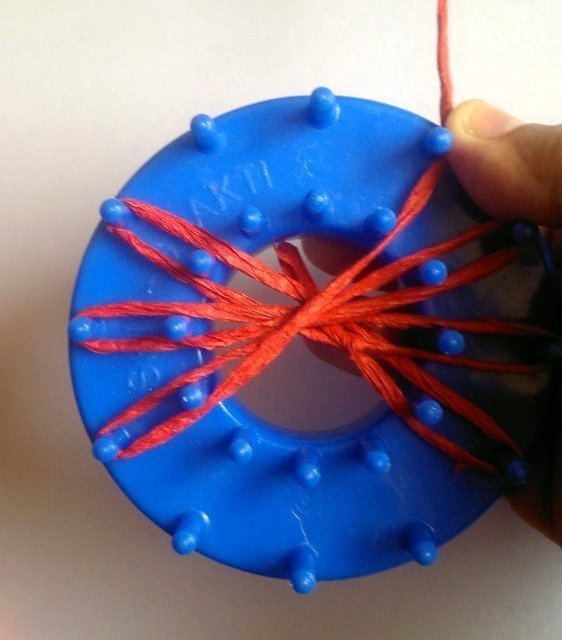
Step 8:
Move the working yarn covering the other side of the peg. Then move it over the peg directly opposite to peg in Step 7.
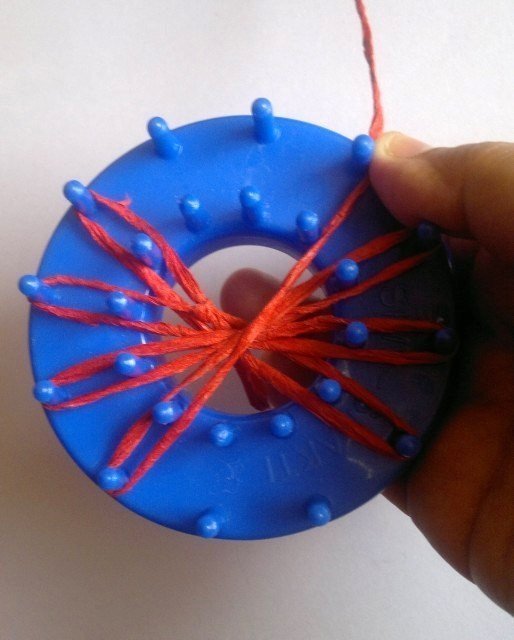
Step 9:
Move the working yarn covering the other side of the peg. Then move it over the peg on opposite left to peg in Step 8.
Step 10:
Move the working yarn covering the other side of the peg. Then move it over the peg directly opposite to peg in Step 9.
Step 11:
Move the working yarn covering the other side of the peg. Then move it over the peg on opposite left to peg in Step 10.
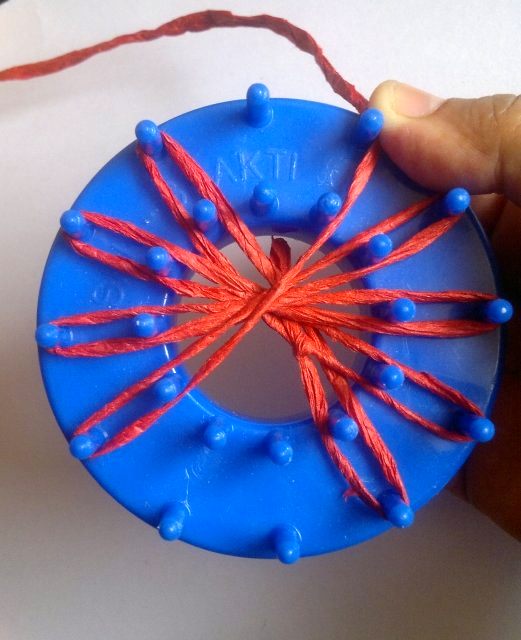
Step 12:
Move the working yarn covering the other side of the peg. Then move it over the peg on opposite left to peg in Step 10.
Step 13:
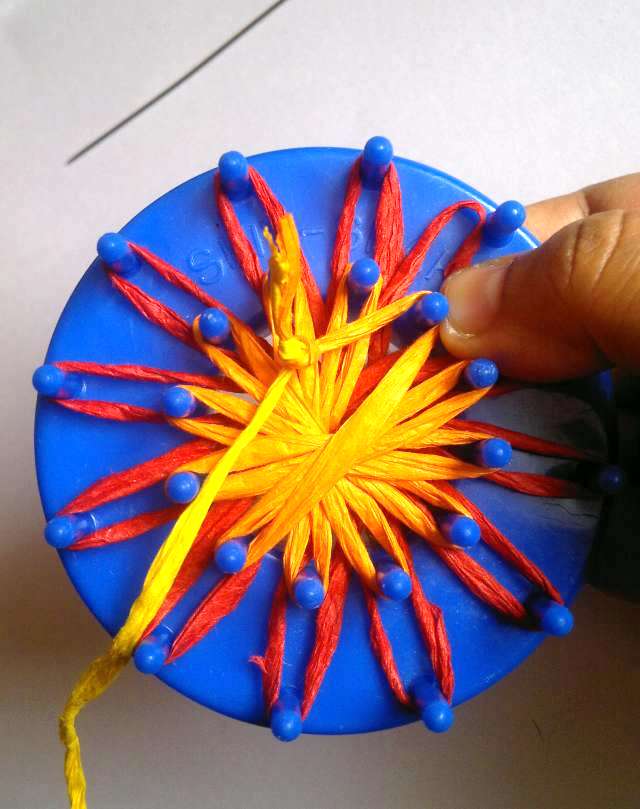
Move the working yarn covering the other side of the peg. Then move it over the peg on opposite left to peg in Step 12. Leave 2 inches of extra yarn and cut the yarn. Join the orange yarn with a knot. Move the knot and working yarn covering the current peg till you come to the center of the flower.
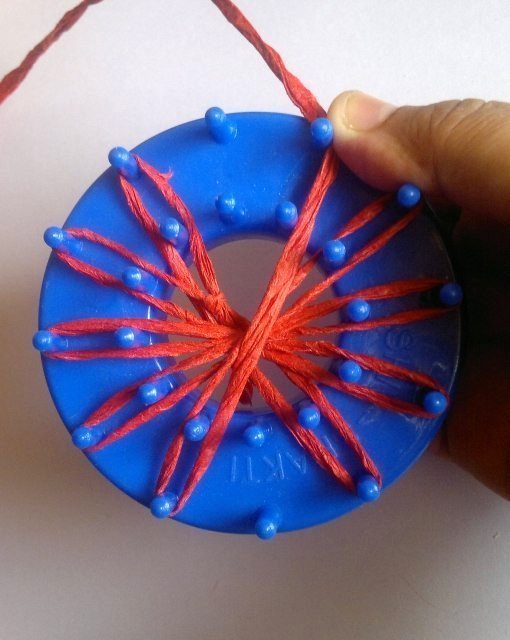
Step 14:
The knot will be exactly in the center.
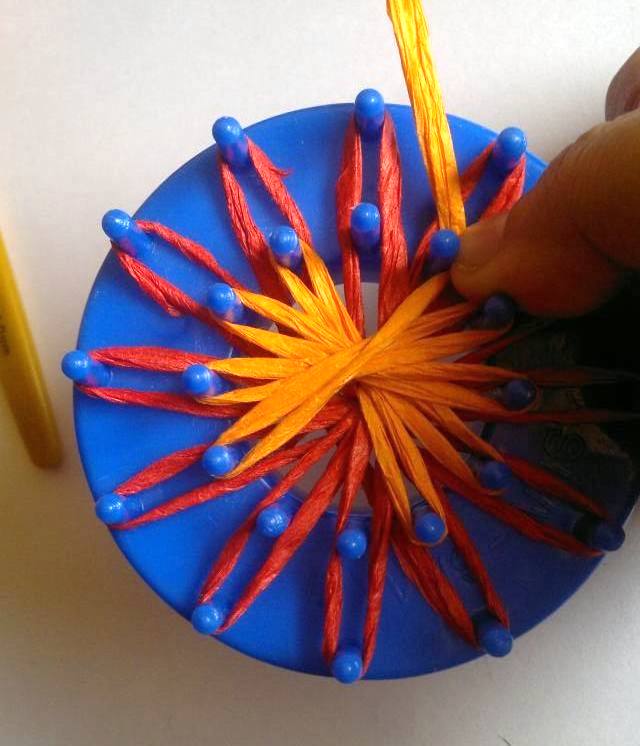
Step 15:
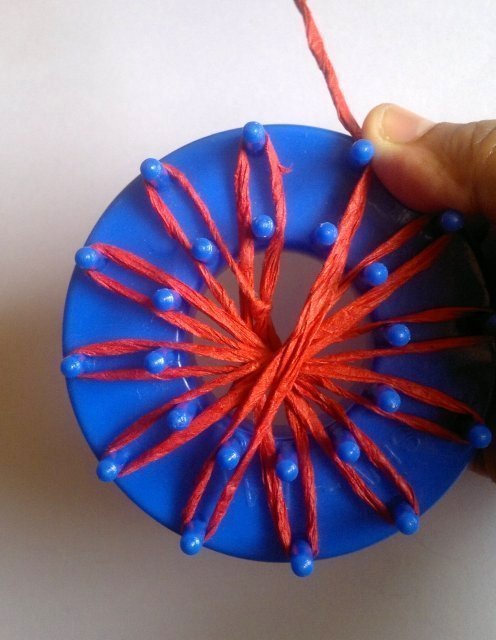
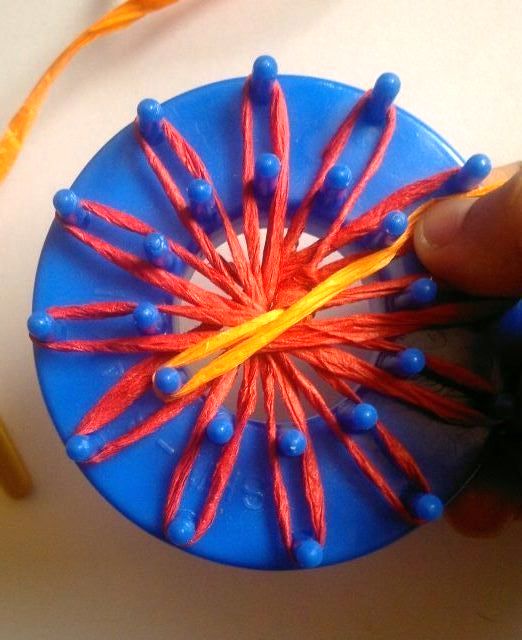
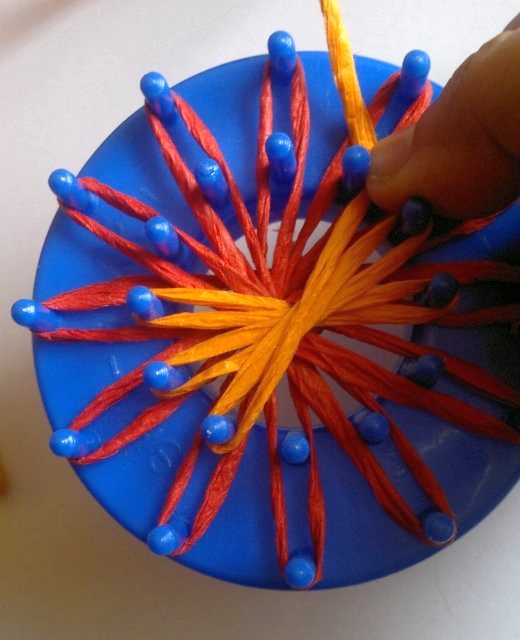
Use a crochet hook from back to front to pull the knot on the wrong side of the flower. Then begin winding the orange petals. Move the working yarn covering the other side of the peg but this time you will wind it over the smaller peg.

Step 16:
Move the working yarn covering the other side of the peg. Then move it over the peg directly opposite to smaller peg in Step 15.
Step 17:
Move the working yarn covering the other side of the peg. Then move it over the peg on opposite left to smaller peg in Step 16.
Step 18:
Move the working yarn covering the other side of the peg. Then move it over the peg directly opposite to smaller peg in Step 17.
Step 19:
Move the working yarn covering the other side of the peg. Then move it over the peg on opposite left to smaller peg in Step 18.
Step 20:
Move the working yarn covering the other side of the peg. Then move it over the peg directly opposite to smaller peg in Step 19.
Step 21:
Move the working yarn covering the other side of the peg. Then move it over the peg on opposite left to smaller peg in Step 20.
Step 22:
Move the working yarn covering the other side of the peg. Then move it over the peg directly opposite to smaller peg in Step 21.
Step 23:
Move the working yarn covering the other side of the peg. Then move it over the peg on opposite left to smaller peg in Step 22.
Step 24:
Move the working yarn covering the other side of the peg. Then move it over the peg on opposite left to smaller peg in Step 22.
Step 25:
Move the working yarn covering the other side of the peg. Then move it over the peg on opposite left to smaller peg in Step 24.
Step 26:
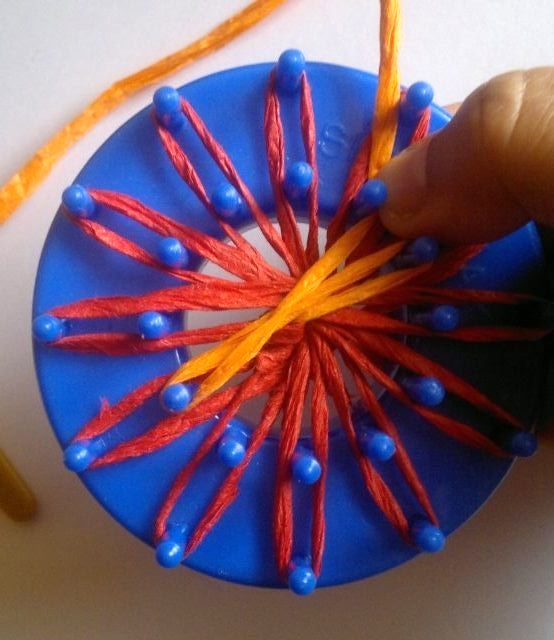
Move the working yarn covering the other side of the peg. Then move it over the peg directly opposite to smaller peg in Step 25.
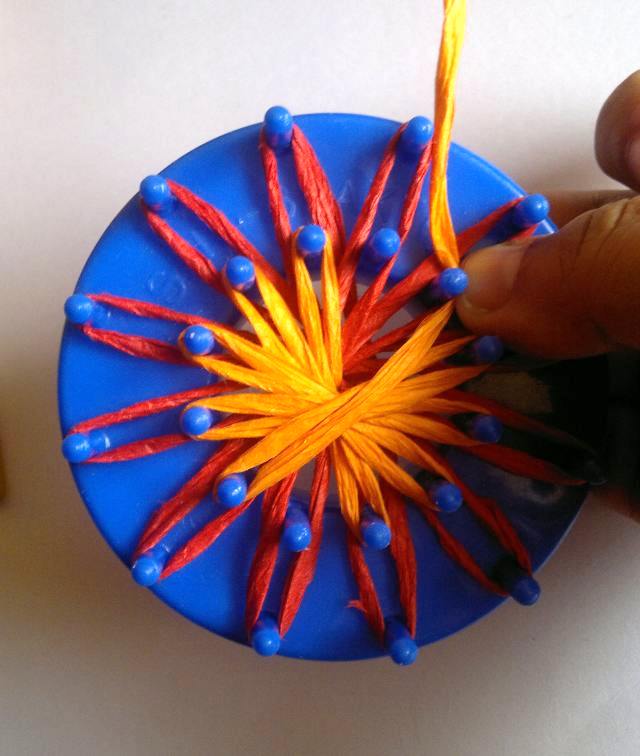
Step 27:
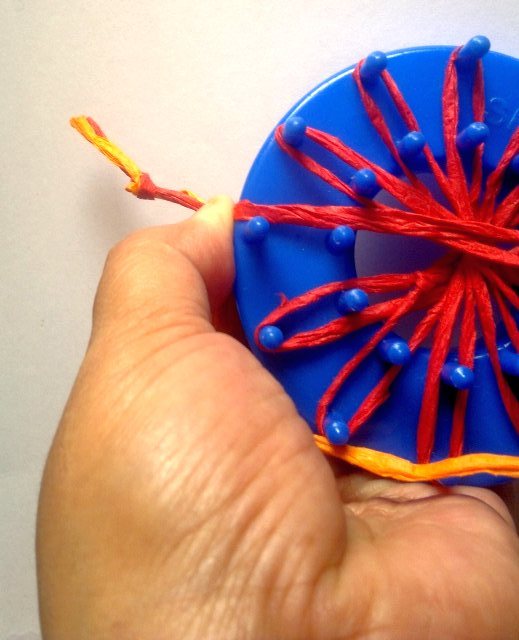
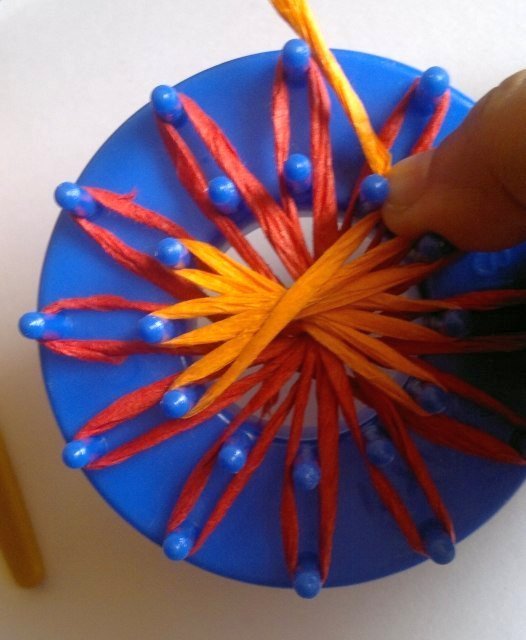
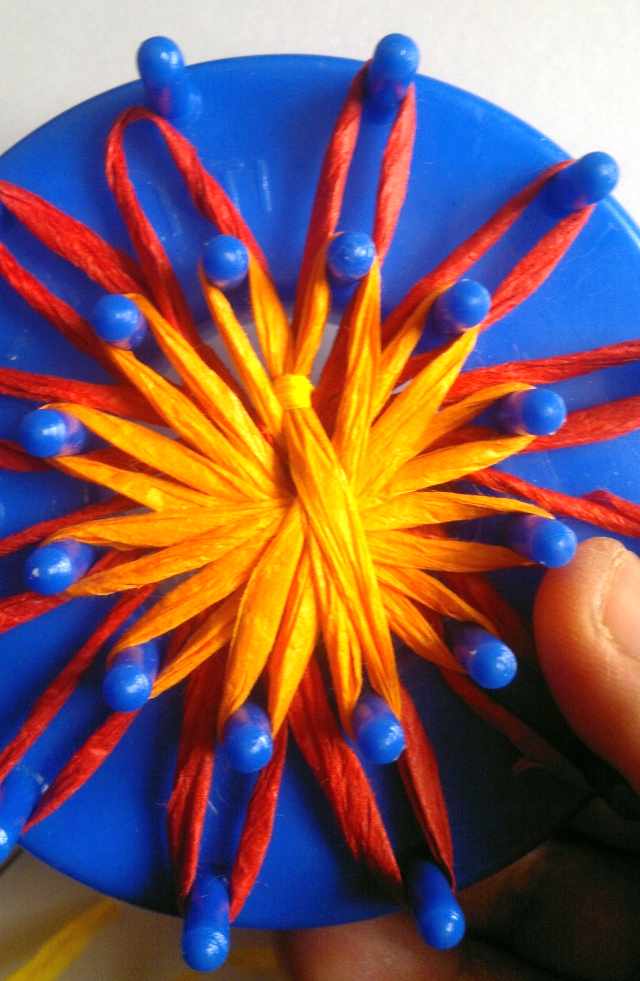
Move the working yarn covering the other side of the peg. Then move it over the peg directly opposite to smaller peg in Step 25. Hold the yarn in place with your thumb over the edge of the loom. Leaving about 2 inches of yarn, cut the end with scissors.
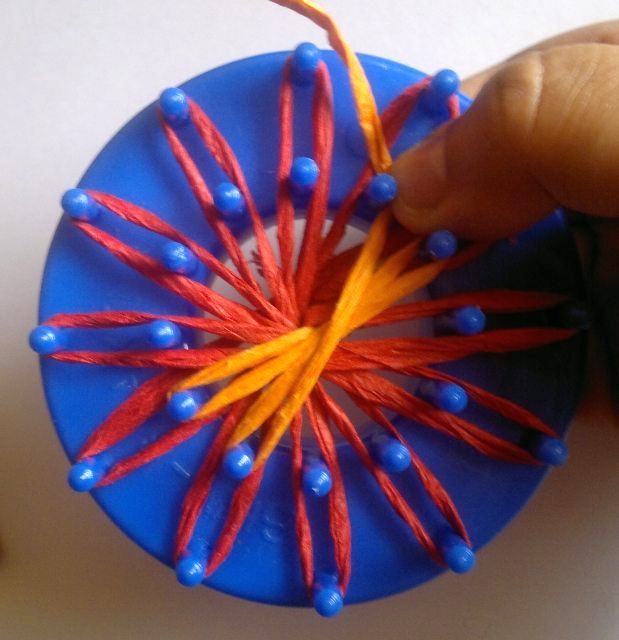
Step 28:
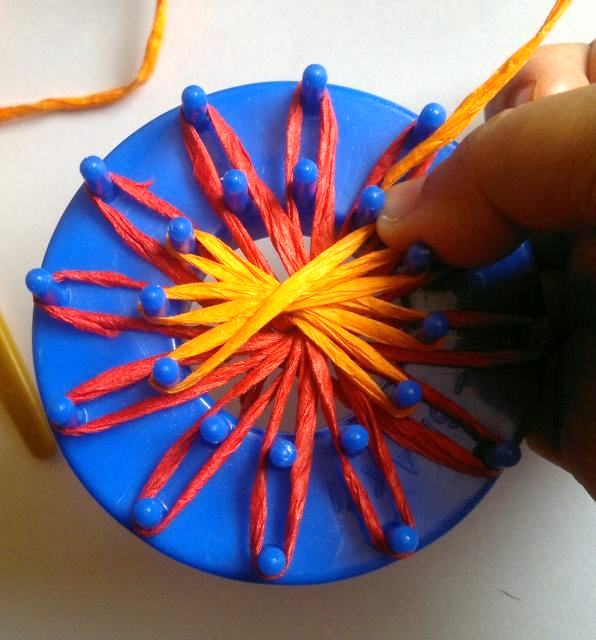
Join the loose end with yellow raffia with a knot. We will use this for the center embroidery. Move the knot and working yarn covering the current peg till you come to the center of the flower. The knot will be exactly in the center.
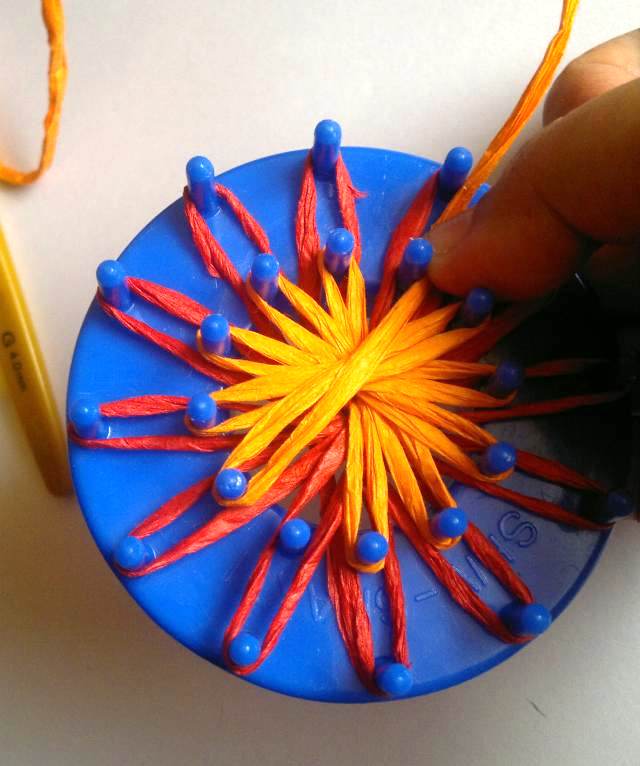
Step 29:
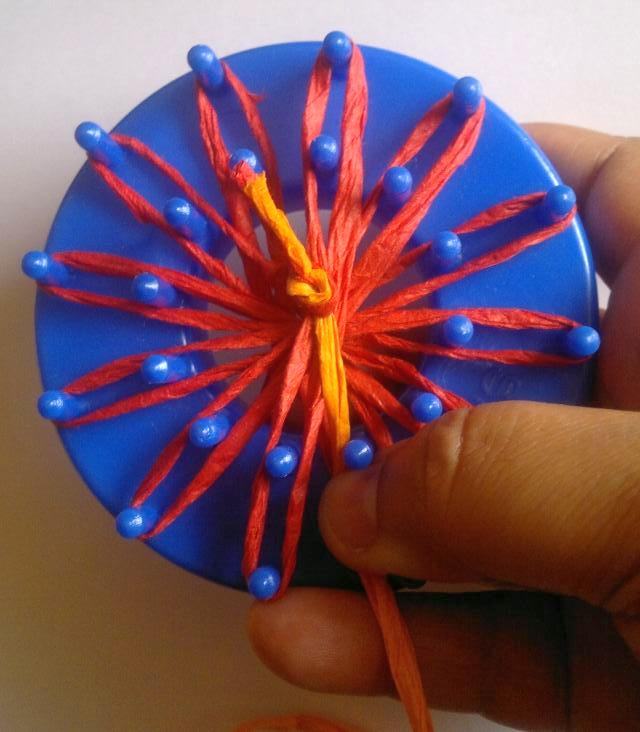
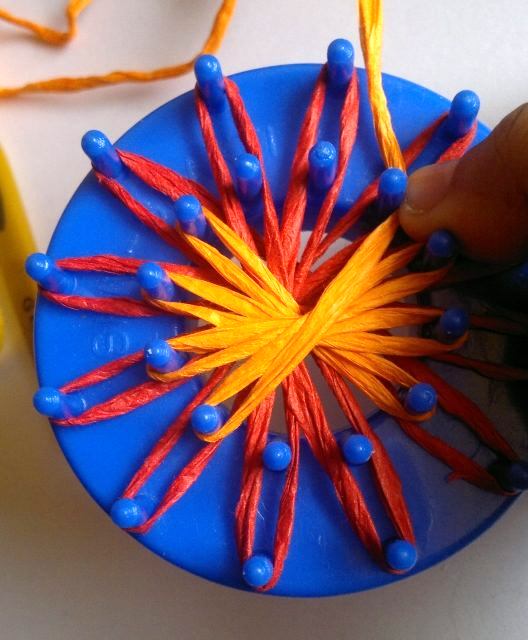
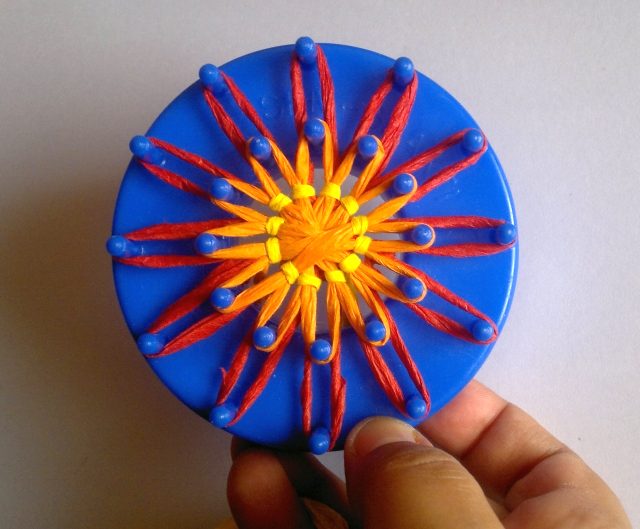
Thread the opening end of yellow raffia with a darning needle. Pull the knot in the center towards the back of the flower. Sew a stitch in between two petals.
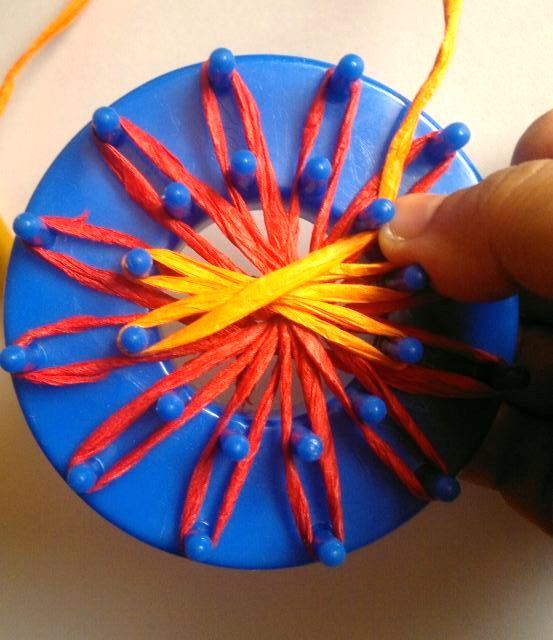
Step 30:
Continue working stitches till all the petals are covered and it looks like a yellow circle in the center.
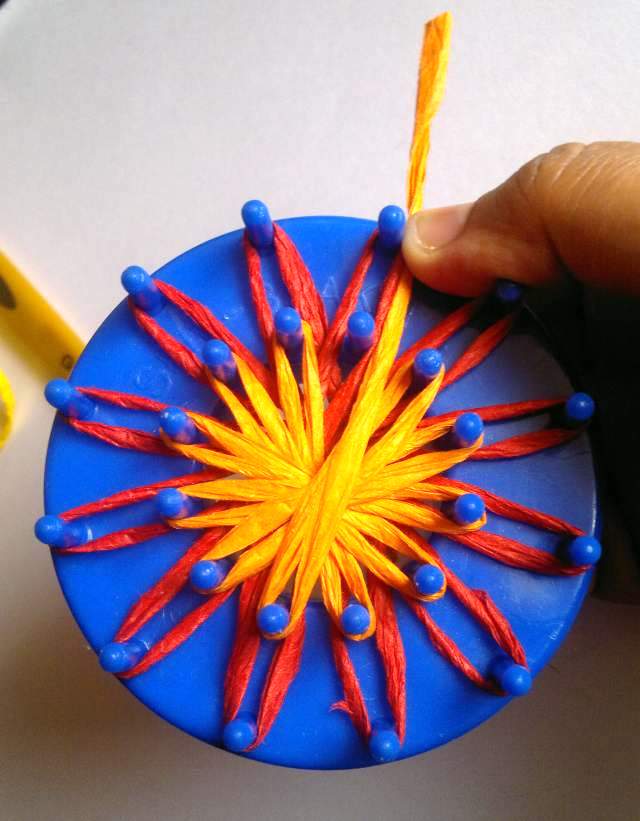
Step 31:
Now, sew a stitch covering one of the petals.
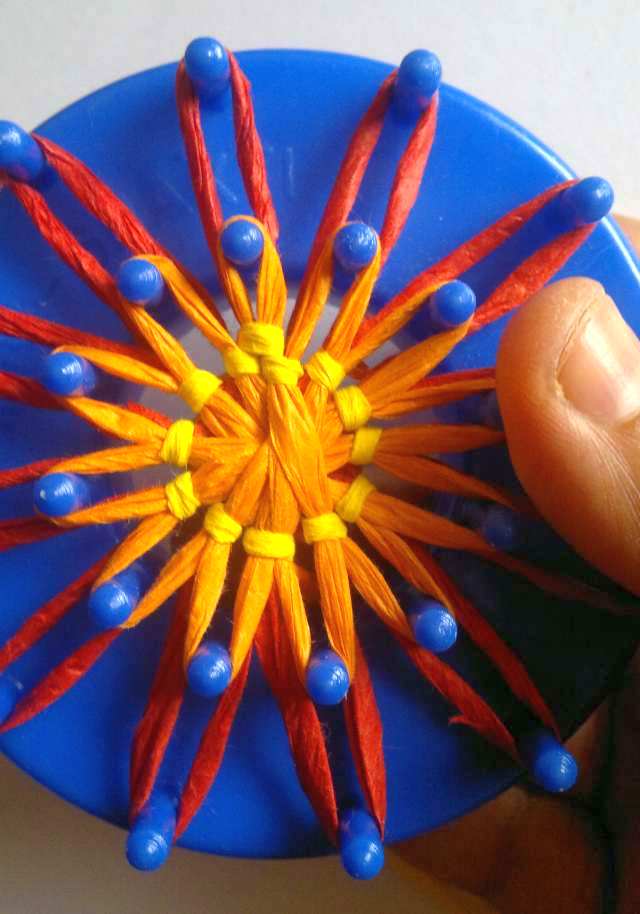
Step 32:
Continue sewing stitches over all the petals till you see a second circle of yellow stitches over and between the previous circle.
Step 33:
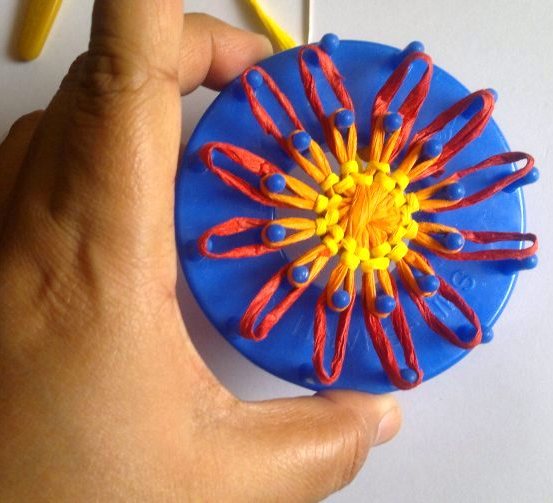
Pull up the red petals from the loom.
Step 34:
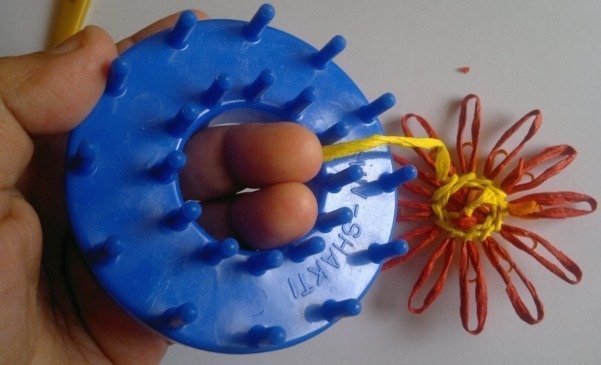
Slowly push your fingers through the bottom back of the petals. The smaller petals along with the entire flower will pop right out of the loom.
Step 35:
There will be small ends that will be visible on the back. Weave in the longer ends inside the stitches. Add a little glue at the end of the shorter ends and stick it in the center.

Step 36:
Fluff and round up the outer and inside petals a bit with your fingers.
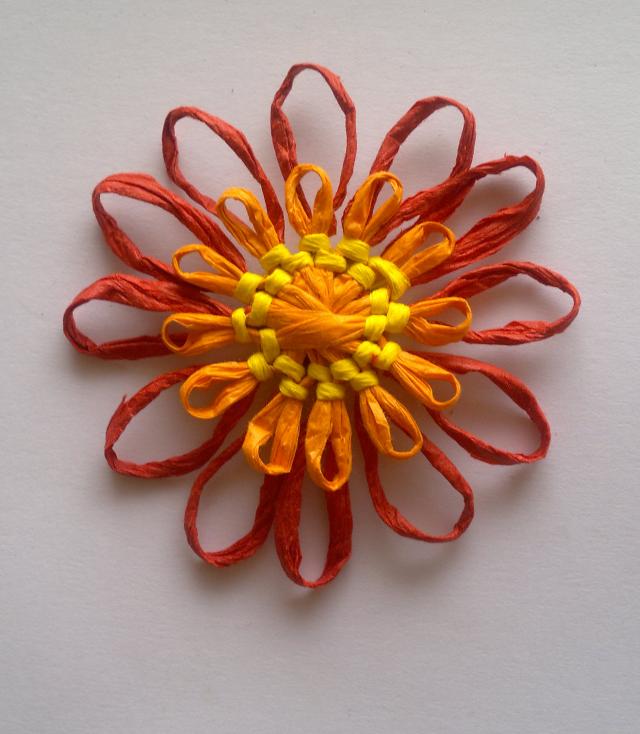
Voila! Your bloom loom flower is now ready. I hope you enjoyed this tutorial. For more DIY and how to tutorials, please subscribe to my blog and share this tutorial if you like it. Thanks! :)
2 thoughts on “How To Make Bloom Loom Flowers”
Comments are closed.
Related Post
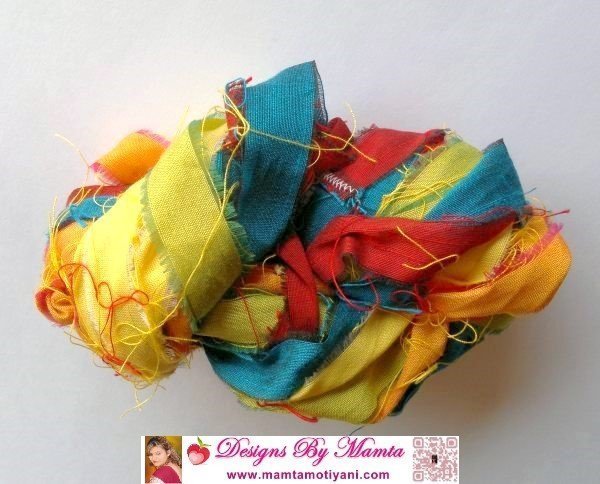
My Handmade Creation – Rainbow Sari Silk Ribbon Yarn
Those who know me, know that I can’t sit still even for a minute without [...]
WONDERFUL!!!!!!!
Best tutorial of this kind I’ve ever seen!!
Just got first loom.
Will practice with your splendid pattern
Thank you so much!!!!
:)
Thank you for your compliment. I am glad you like it and can’t wait to see your loom flower. :)